
EVE-NG Download Are you preparing for a network certification exam or need to test a complex network setup, but don’t have access to expensive physical networking equipment? Meet EVE-NG, a powerful and affordable network emulation tool that lets you create and test virtual network environments from your computer. In this comprehensive guide, you’ll learn how to EVE-NG Download and install it step-by-step.
What is EVE-NG
EVE-NG (Emulated Virtual Environment – Next Generation) is a powerful web-based network emulation platform designed to help IT professionals, network engineers, and cybersecurity experts create and test complex network environments in a virtual lab.
Who is EVE-NG for?
- Network engineers preparing for certifications (CCNA, CCNP, CCIE, JNCIA, JNCIP, HCIA, HCIP)
- Cybersecurity professionals testing firewall and IPS configurations
- IT teams validating designs before production rollout
- Students who need hands-on practice without buying physical gear
EVE-NG System Requirements (2026)
Before you start the EVE-NG download, make sure your machine can actually run it. Network emulation is RAM-hungry, especially when you start adding multiple routers and firewalls to a lab.
Minimum requirements:
- CPU: Intel or AMD with VT-x/AMD-V virtualization support enabled in BIOS
- RAM: 8 GB (you’ll only run very small labs)
- Storage: 40 GB free SSD space
- OS: Windows 10/11, macOS, or Linux as host
- Virtualization: VMware Workstation Pro 17 (Windows/Linux) or VMware Fusion (macOS)
Recommended for serious lab work:
- CPU: 4+ physical cores (8+ threads), Intel i7/i9 or AMD Ryzen 7/9
- RAM: 16 GB minimum, 32 GB ideal for multi-firewall labs
- Storage: 100 GB+ NVMe SSD
- Network: Gigabit Ethernet for image transfers
Note for Apple Silicon (M1/M2/M3/M4) users: EVE-NG does not officially support ARM-based Macs because most vendor images are compiled for x86. You can experiment with UTM or third-party workarounds, but expect compatibility issues. Intel Macs run EVE-NG normally via VMware Fusion.
EVE-NG Community Edition vs Professional Edition
EVE-NG comes in two flavours. Most learners only need the free Community Edition.
| Feature | Community Edition (Free) | Professional Edition (Paid) |
|---|---|---|
| Price | Free | Paid (per-user license) |
| Max nodes per lab | 63 | Unlimited |
| HTML5 console | Basic | Advanced (multi-user) |
| Hot-add/remove nodes | No | Yes |
| Multi-user labs | No | Yes |
| Lab time-out control | No | Yes |
| Docker container support | Limited | Full |
| Best for | Self-study, certifications | Enterprises, training centres |
For everything that follows in this guide, we use the Community Edition v6.2.0-4 — the latest free version as of 2026.
EVE-NG Download-Where to Get the Latest Version
Always download EVE-NG from the official source — never from third-party mirrors, which may bundle malware.
Official EVE-NG download page: https://www.eve-ng.net/index.php/download/
You’ll see two download formats:
- ISO file — fresh install on a new VM (recommended for this guide).
- OVF file — pre-built VM image you import directly into VMware.
We’ll use the ISO method in this tutorial because it gives you full control over VM hardware and works reliably with the newest VMware Workstation Pro 17. Download the ISO and save it somewhere you’ll remember.
You’ll also need the EVE-NG Client Pack (Windows, macOS, or Linux). This pack contains Wireshark integration, terminal clients (PuTTY, SecureCRT support), and the UltraVNC client used for some device co
How to EVE-NG 2026 Download & Install
Prerequisites
In May 2024, Broadcom made VMware Workstation Pro free for personal use — a huge change from previous years when you needed a paid license. If you’re not running it commercially, you can use the full Pro version at no cost.
Download VMware Workstation Pro:https://www.vmware.com/products/desktop-hypervisor/workstation-and-fusion
Install it with default settings — there’s nothing tricky about the VMware installer. Once installed, open it and confirm it launches without licence errors.
One critical BIOS check before you continue: EVE-NG needs nested virtualization. On your host machine, reboot into BIOS/UEFI and confirm that Intel VT-x (Intel CPUs) or AMD-V / SVM Mode (AMD CPUs) is enabled. Without this, your labs will boot but device images will fail to start.
Step-by-Step EVE-NG Installation on VMware Workstation Pro
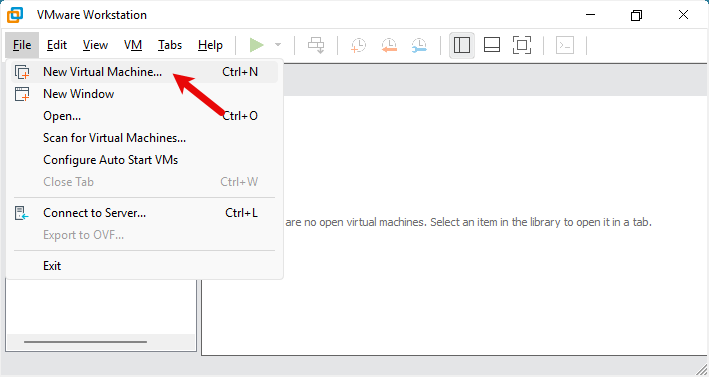
Task 1: Create a Virtual Machine
Go to File > New Virtual Machine or use Ctrl+N
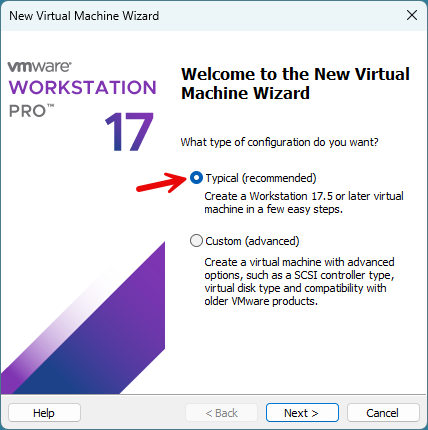
Select > Typical (recommended) and then press next.
Navigate to the EVE-NG Community ISO
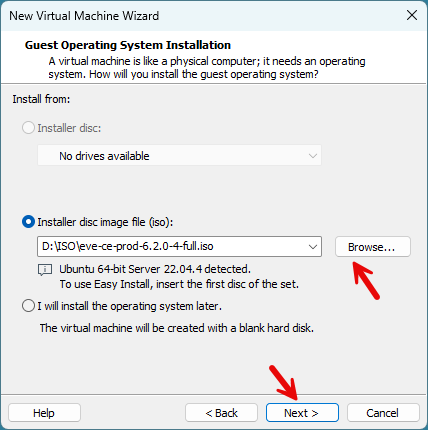
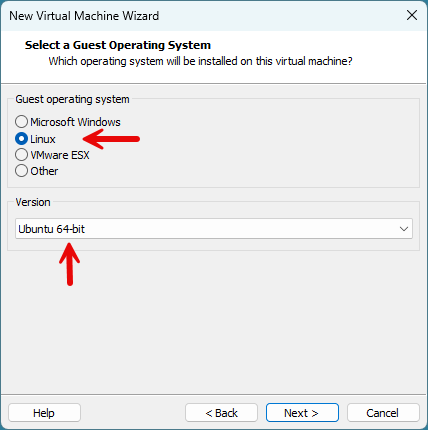
Select > Guest Operating System and version.
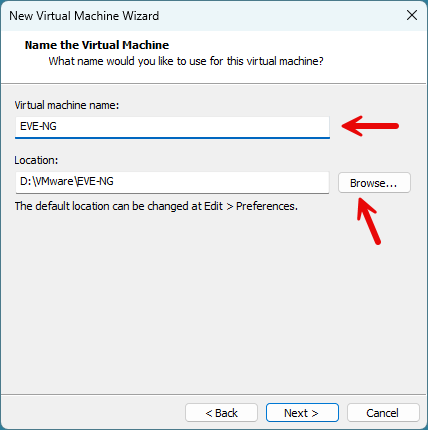
Add > Virtual machine name and Choose the storage location of the Virtual Machine.
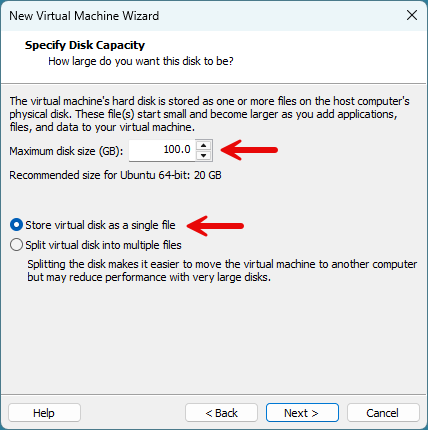
Specify the disk capacity
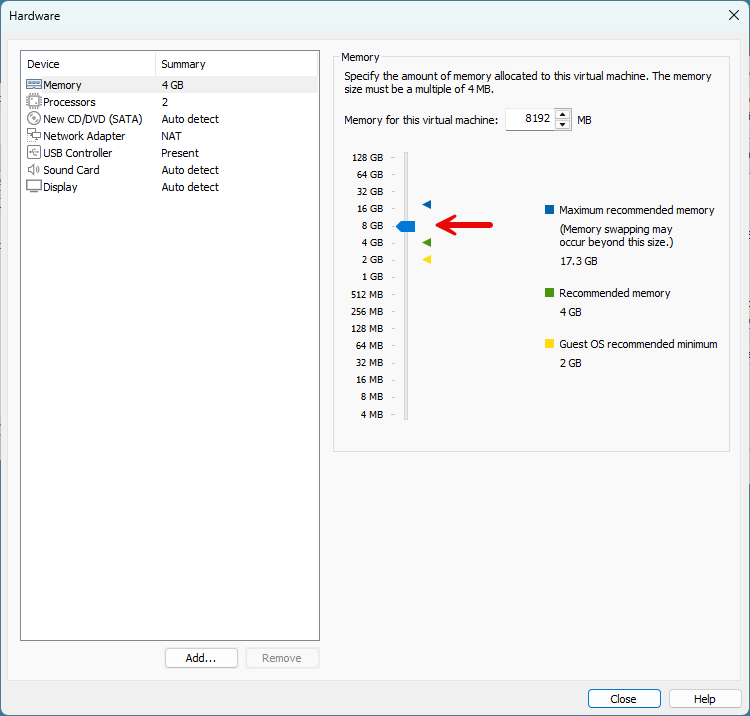
Customize the hardware> By default, the VM is allocated 4GB of RAM, but we need to increase this to 8 GB.
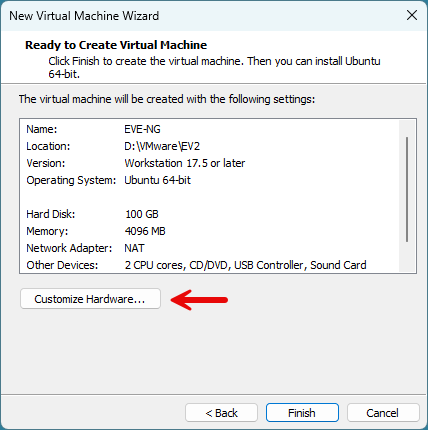
Memory > Increase Ram
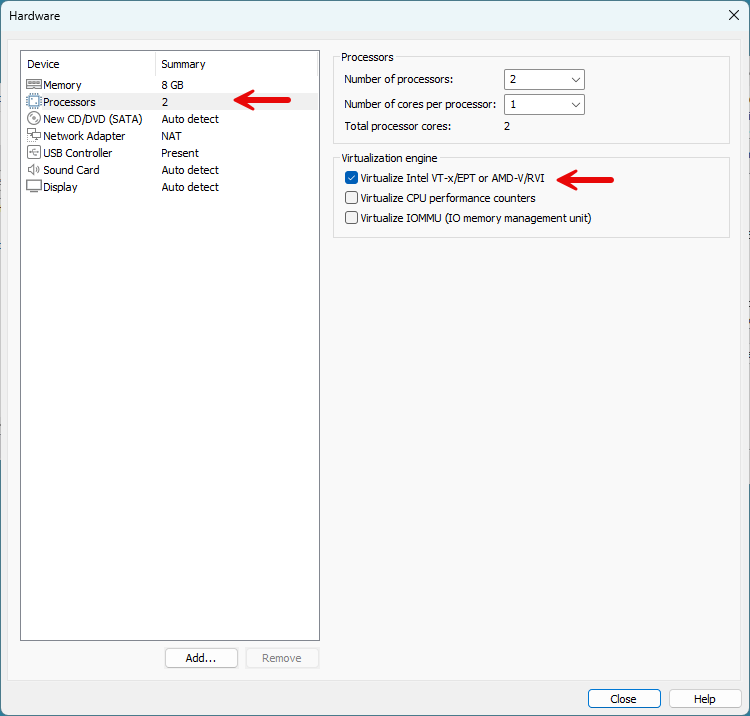
Processors > VirtuaIize Intel VT-x/AMD-V
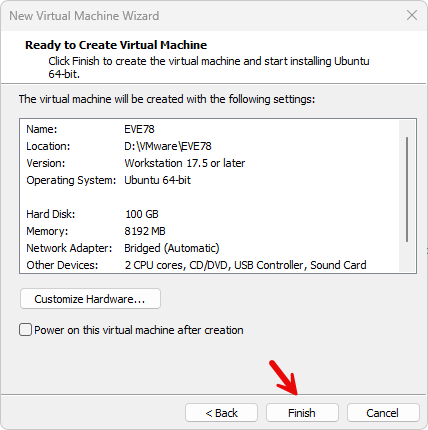
Press the “Finish” button.
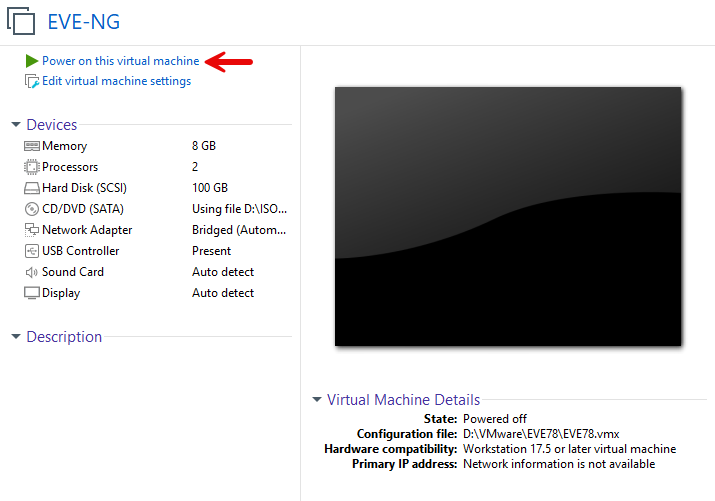
Task 2: Power on the EVE-NG Virtual Machine
Power on the Virtual Machine.
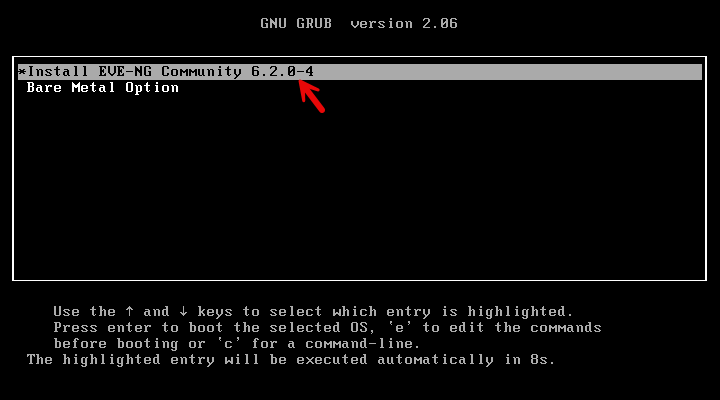
After booting, select ‘Install EVE-NG Community‘ from the boot menu.
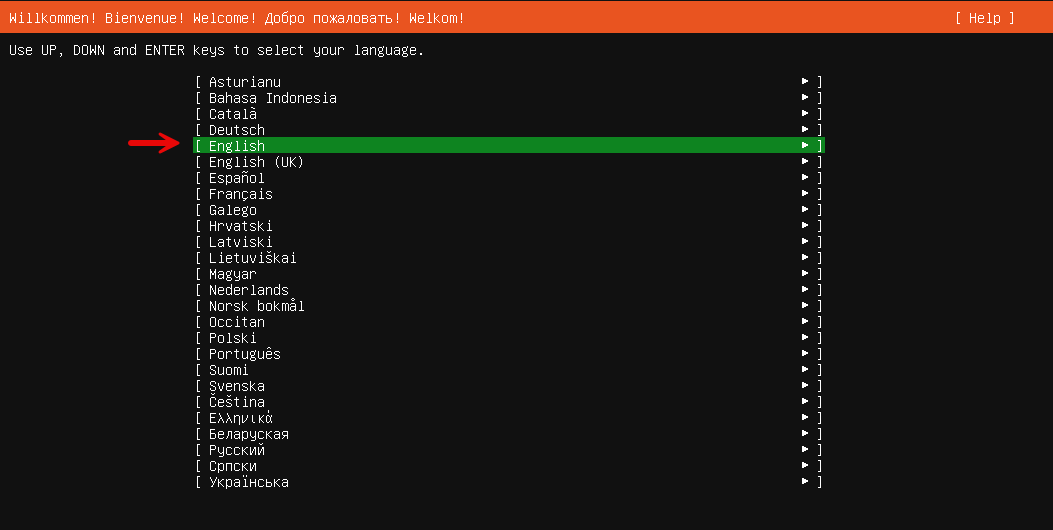
After the system boots, the welcome screen will appear. Select your preferred language and press “Enter“.
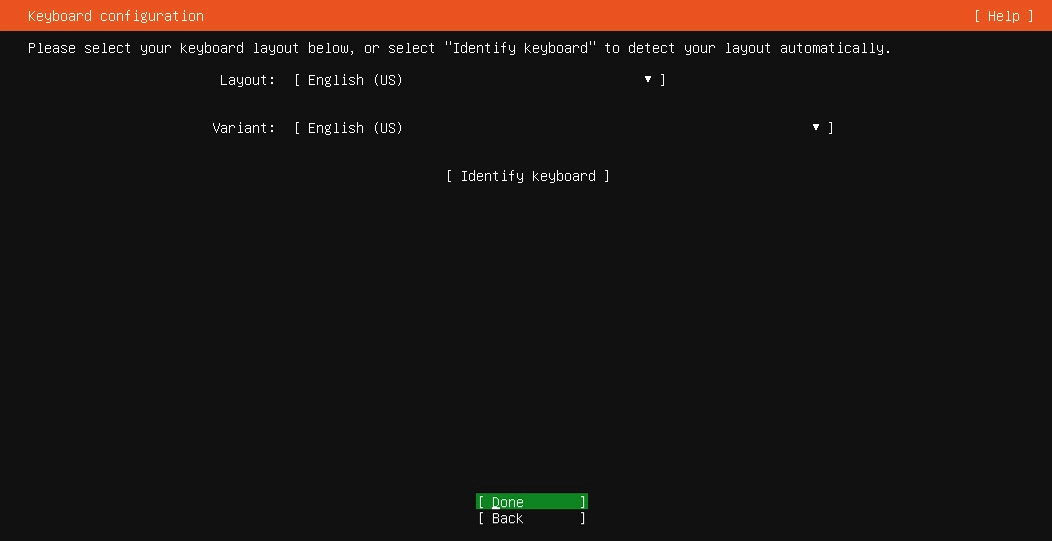
Select Keyboard configuration and select “Done“
Select “Continue” and press “Enter“
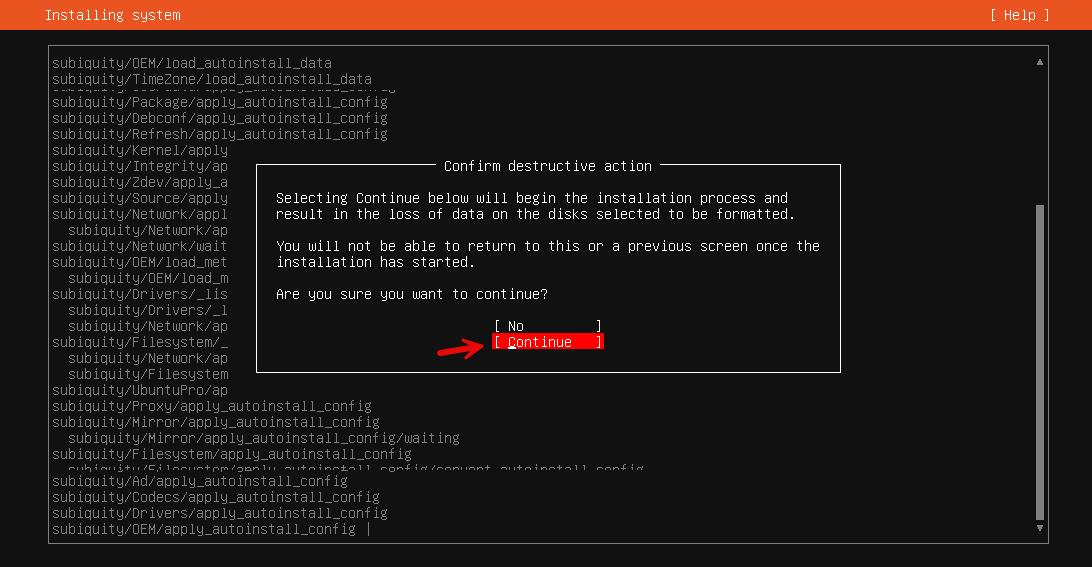
After the installation is complete, the machine will reboot.
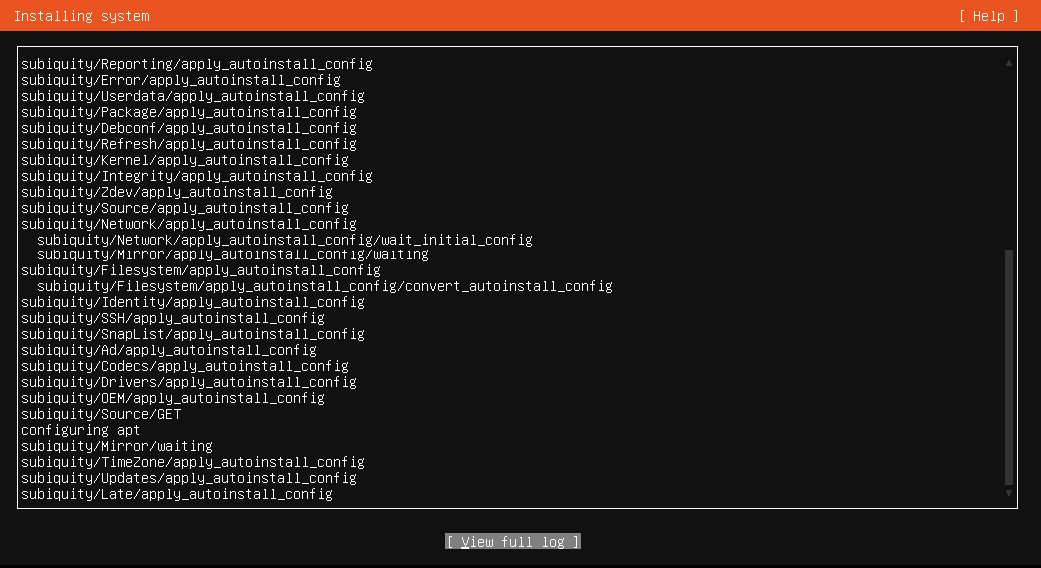
Task 3: Post-Installation: EVE-NG basic Configuration
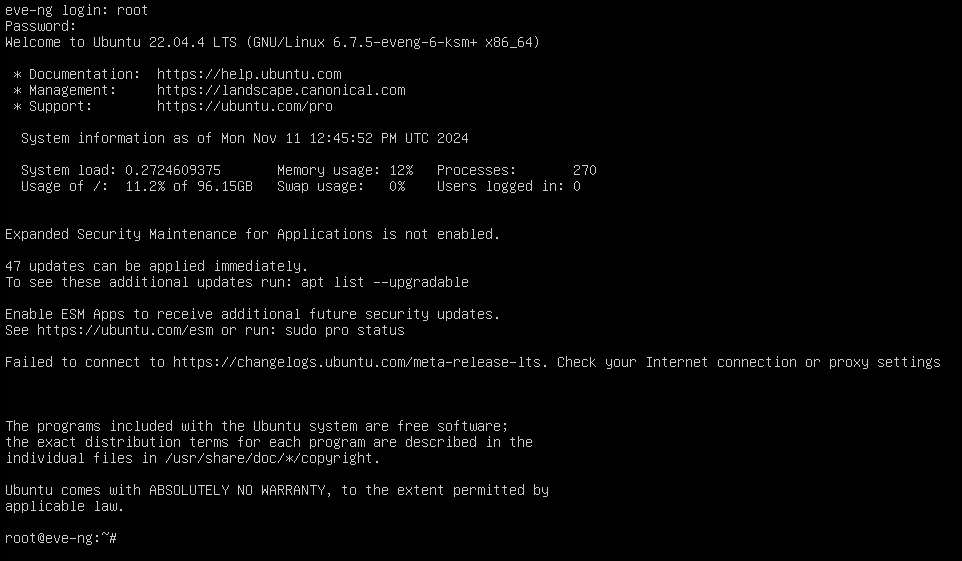
Once the installation is completed, log in to the EVE-NG system, eve-ng default login is:
Username: root
Password: eve

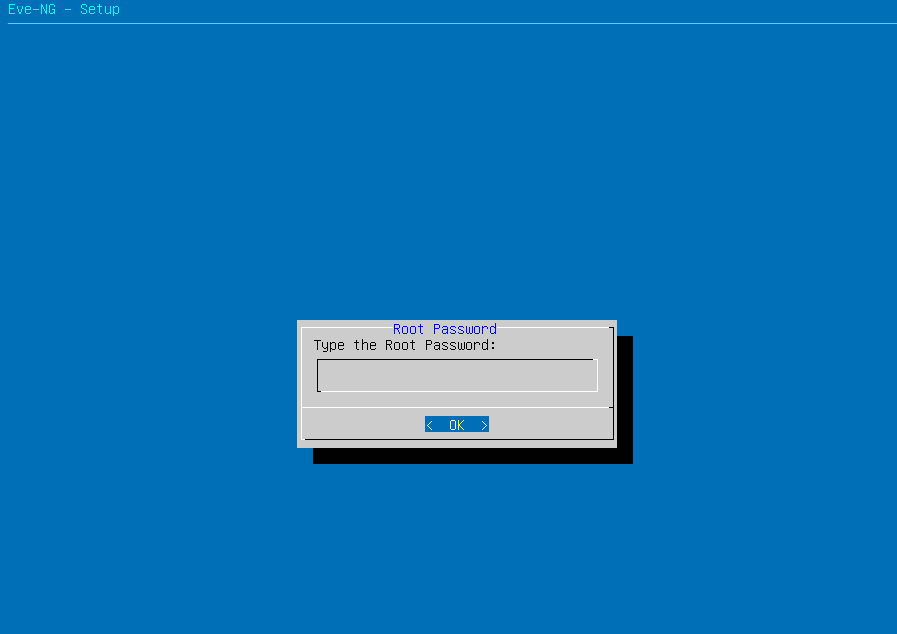
When you first log in to the EVE-NG, a configuration prompt will be shown for setting up EVE-NG. you can change the password here.
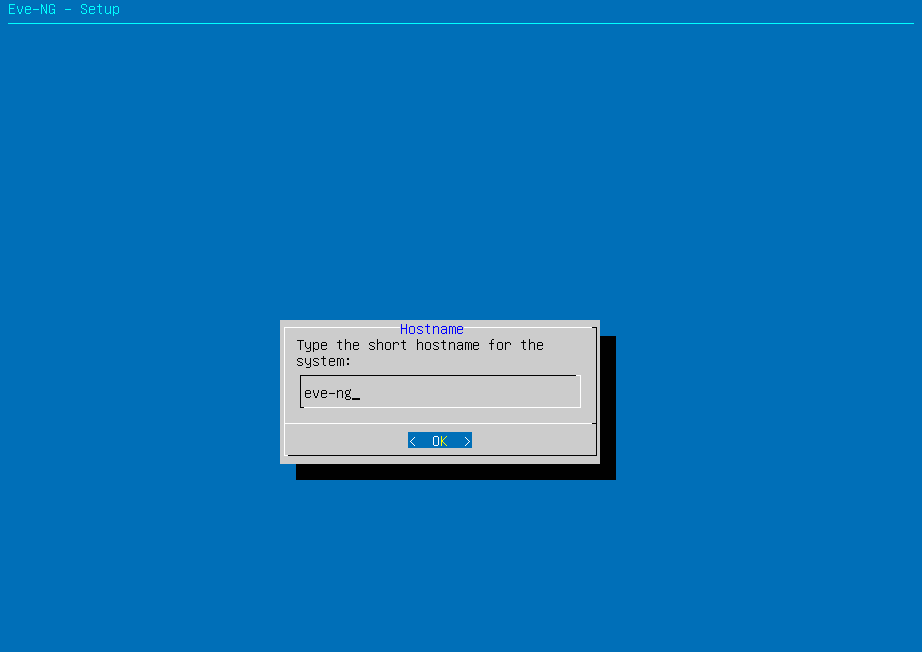
you can change the “hostname” here, but I proceed with the default hostname.
Now you have the option to set up DNS here if you prefer; in my case, I press enter and proceed to the next step.

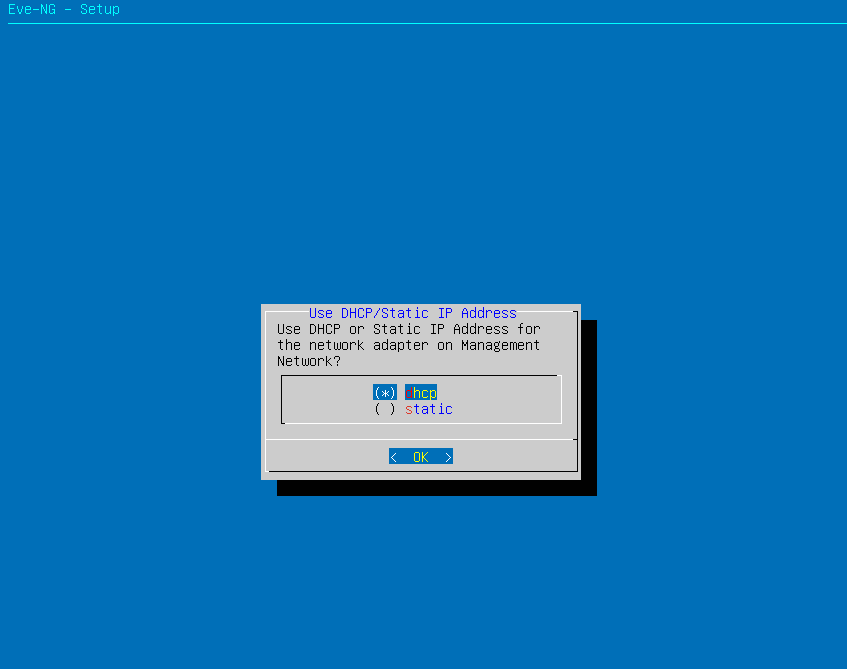
here you can set a static IP address for access to the eve-ng. I stick with default.
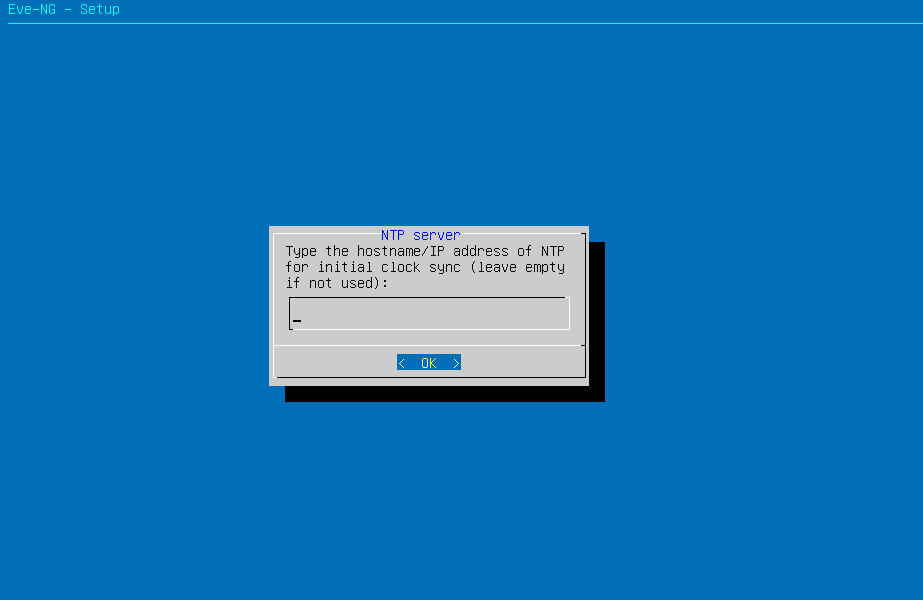
assign the hostname/IP address of NTP for the initial clock sync if don’t want to use leave empty.
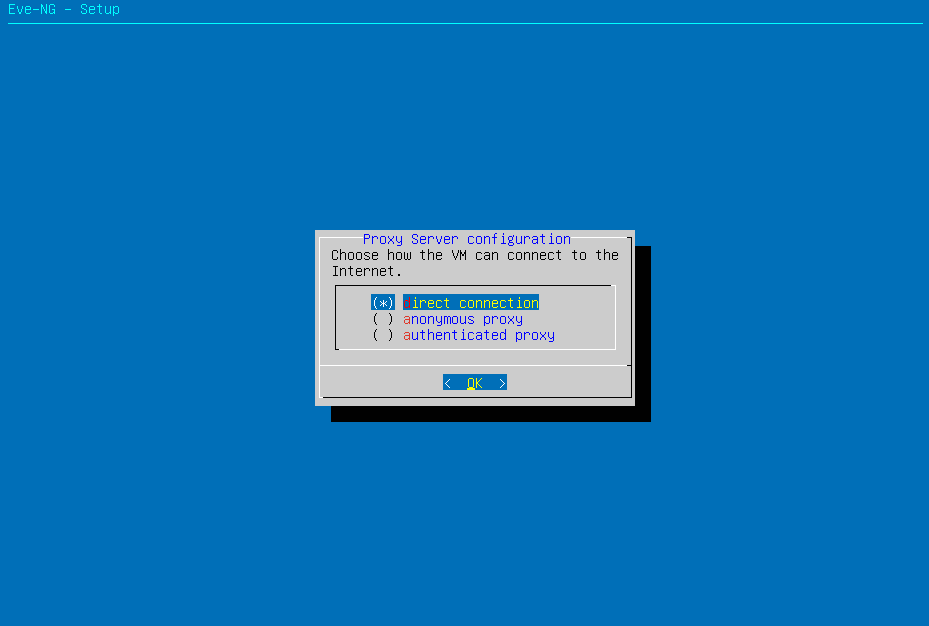
Proxy server configuration chooses how to eve-ng connect to the internet, using the default option “Direct Connection“
The system will restart after the configuration is completed.
EVE-NG is now ready for use; you can begin uploading images to EVE-NG.
Common EVE-NG Installation Errors & Troubleshooting
These are the issues that trip up most people during their first EVE-NG install.
“VT-x is not available” or “This kernel requires the following features”
Your CPU’s hardware virtualization is disabled. Reboot into BIOS/UEFI and enable Intel VT-x or AMD-V / SVM Mode. Also confirm in VMware that Virtualize Intel VT-x/EPT is ticked under Processor settings.
EVE-NG boots but no IP address appears at login
DHCP didn’t get a lease. From the EVE-NG console, run ip addr to confirm. If eth0 is up but has no IP, run dhclient eth0. If still no IP, switch the VM’s network adapter to Bridged in VMware and reboot.
Web UI login fails with “Wrong username or password”
The web UI uses admin / eve by default — different from the console root password. Don’t confuse the two. If you’ve forgotten the admin password, reset it from the console with /opt/unetlab/wrappers/unl_wrapper -a resetadminpw.
Devices added to a lab won’t start
Almost always one of three causes: (1) nested virtualization isn’t enabled in VMware, (2) the EVE-NG VM doesn’t have enough RAM allocated, or (3) the device image was uploaded but permissions weren’t fixed. After uploading any image, run /opt/unetlab/wrappers/unl_wrapper -a fixpermissions on the EVE-NG console.
Black screen or hangs on first boot
Usually a corrupted ISO download. Verify the SHA256 checksum against the value on eve-ng.net, or re-download from a different mirror.
Web UI extremely slow
Your host machine is probably underspec’d, or you’re running EVE-NG from a mechanical drive. Move the VM files to an SSD if possible, and increase RAM allocation.
EVE-NG vs GNS3 vs Cisco Packet Tracer — Which Should You Use?
This is the question every networking student asks. Short answer: use the one that matches your exam and your hardware.
Cisco Packet Tracer is a simulator, not an emulator. It runs Cisco’s simplified version of IOS, is lightweight enough for almost any laptop, and is free with a Cisco Networking Academy account. Best for CCNA-level studies and early labs. It cannot run real vendor images and cannot emulate non-Cisco gear.
GNS3 is an emulator like EVE-NG. It runs real images but uses a client-server architecture: a Windows or macOS GUI talks to a GNS3 VM in the background. It supports more device types in some niche scenarios but has a steeper learning curve and more moving parts to break.
EVE-NG is also a real-image emulator, but everything runs server-side and is accessed via a browser — no thick client to install or update. Multi-vendor support is excellent. It is the most popular choice for CCNP, CCIE, JNCIP, and security certifications because of how cleanly it handles Cisco, Juniper, Palo Alto, Fortinet, and Check Point images side by side.
Our recommendation: Start with Packet Tracer for CCNA fundamentals, move to EVE-NG for CCNP and above. Skip GNS3 unless you have a specific reason to use it.
Frequently Asked Questions about EVE-NG
Is EVE-NG free?
Yes. The Community Edition is completely free and supports up to 63 nodes per lab u2014 enough for almost all certification labs up to CCIE level. The Professional Edition is paid and adds enterprise features like multi-user labs and unlimited node counts.
What is the latest version of EVE-NG in 2026?
The current Community Edition release is v6.2.0-4, released 21 July 2024 and still the latest stable Community build as of May 2026. The Professional Edition is at v6.2.0-20.
Can I run EVE-NG on Windows 11?
Yes. Windows 11 runs VMware Workstation Pro without issues, and EVE-NG runs inside that VM normally. Just make sure Hyper-V is fully disabled in Windows Features before launching VMware u2014 running both at the same time causes nested virtualization conflicts.
Does EVE-NG work on Mac with Apple Silicon (M1/M2/M3/M4)?
Not officially. Most vendor images are compiled for x86-64 and will not run on ARM. Intel-based Macs work fine via VMware Fusion. If you have an Apple Silicon Mac, your realistic options are: (1) a cloud VPS running EVE-NG, (2) a separate Intel/AMD machine, or (3) UTM with significant compromises.
How much RAM does EVE-NG need?
Allocate at least 8 GB to the EVE-NG VM for small labs. For multi-router CCNP labs, 16 GB is comfortable. CCIE-level labs with firewalls and SD-WAN images need 24 to 32 GB allocated to the VM.
Is EVE-NG better than GNS3?
For most users, yes. EVE-NG is easier to maintain because everything lives in one VM and is accessed via browser. GNS3 splits the GUI and the engine across two components, which gives more failure points. That said, GNS3 has a slightly broader appliance library for some niche devices.
Can I run EVE-NG on VirtualBox?
Technically yes, but it is not recommended. VirtualBox’s nested virtualization support is less mature than VMware’s, and you will hit issues with vendor images that need KVM acceleration. Stick with VMware Workstation Pro for the smoothest experience.
Conclusion
Congratulations! You’ve successfully installed eve-ng. In this step-by-step guide, we have learned How to EVE-NG 2026 Download & Install. This guide provides straightforward steps that can be completed quickly. Once you have installed eve-ng, you can begin building your virtual networking lab environment.
If this guide helped you, share it with someone studying for their CCNP or CCIE — they’ll thank you. And drop a question in the comments below if you hit something this guide didn’t cover.

Usman Hassan
I am working in IT field 15 years, working as Network Engineer and also MCT (Microsoft Certified Trainer).